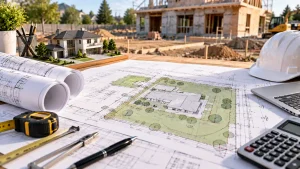

Understanding how to create a Site Plan for Permit is essential if you want your project approved without delays or rejection. A Site Plan for Permit is one of the most important drawings required by city building departments for residential and commercial projects. This step-by-step guide explains how to prepare a permit-ready site plan, whether you’re creating it yourself or working with a professional drafting service.
You’ll learn:
- How cities review your drawing for approval
- What must be included in a permit-ready site plan
- How to avoid common rejection mistakes
Once you understand the official requirements for a Site Plan for Permit, it becomes much easier to prepare accurate drawings, avoid common errors, and improve your chances of faster permit approval.
Skip the Steps — Get a Permit-Ready Site Plan in 24 Hours for $99
Professional, permit-ready site plans starting at $99. Standard Basic and Standard scopes typically target 24–48 hours. Nationwide online drafting support.
✅ permit-focused drafting and revision support | ✅ reviewer-requested revisions within the original agreed scope | ✅ the published cancellation and refund policy
What Is a Site Plan?
A Site Plan for Permit is a scaled technical drawing that shows how a property is organized, including existing structures and proposed improvements. City planning departments use a Site Plan for Permit to verify that a project complies with local zoning and building regulations before construction begins.
A complete site plan typically includes property boundaries, lot dimensions, existing buildings, proposed construction, setbacks, driveways, parking areas, utility connections, and landscaping details. A properly prepared Site Plan for Permit helps ensure your project meets local requirements and reduces the risk of permit delays or revisions.
Why You Need a Site Plan for a Permit
Most cities require a Site Plan for Permit because it allows reviewers to confirm that your project meets zoning, safety, and building code requirements. Whether you’re building a new home, adding a garage, installing a pool, or constructing a deck, an accurate site plan helps speed up the permit review process.
Building departments use a site plan to verify setback compliance, lot coverage, utility placement, emergency access, and drainage requirements. Without a compliant Site Plan for Permit, your application may be delayed or returned for corrections.
How Cities Review a Site Plan
Before approving a Site Plan for Permit, city reviewers carefully compare the drawing with local zoning and building regulations. Their goal is to ensure the proposed project meets all required standards before construction begins.
During the review, officials typically verify property boundaries, building dimensions, setback distances, zoning compliance, easements, and required drawing elements such as the north arrow and scale. Even small mistakes, such as incorrect measurements or missing labels, can delay approval or result in your Site Plan for Permit being returned for corrections.
SteStep 1: Find Your Jurisdiction’s Requirements
Before creating your Site Plan for Permit, contact your local building department or visit its website to review the permit submittal requirements. Check the required drawing scale, title block format, accepted file types, and all mandatory elements to ensure your site plan meets local standards from the start.
Step 2: Gather Your Property Data
Collect all the information needed before you begin drawing. This includes your lot dimensions, parcel ID, legal description, structure measurements, and local setback requirements. Having accurate property data makes it much easier to prepare a complete Site Plan for Permit.
Step 3: Set Up Your Drawing at the Correct Scale
Using the correct drawing scale is one of the most important parts of creating a Site Plan for Permit. Whether you’re using Auto CAD or graph paper, every measurement should be drawn proportionally so reviewers can accurately verify your project.
Step 4: Draw Property Lines
Start by drawing the property boundaries with accurate dimensions. Be sure to label each side, include the adjacent street name, and mark any easements or rights-of-way shown on your property records.
Step 5: Add Existing Structures
Include every existing structure on the property, such as the house, garage, shed, deck, fence, or swimming pool. Label each structure clearly and provide its overall dimensions to create a complete Site Plan for Permit.
Step 6: Add the Proposed Improvement
Draw the new structure or improvement in its planned location and label it clearly. Whether you’re building a fence, pool, garage, or home addition, the proposed work should be easy for reviewers to identify.
Step 7: Dimension All Setbacks
Show the exact distance between the proposed improvement and each property line. Clearly labeled setback measurements help building departments confirm your project complies with local zoning regulations.
Step 8: Add the North Arrow and Scale
Every Site Plan for Permit should include a north arrow and a graphic or written drawing scale. These elements help reviewers understand the orientation and dimensions of your property.
Step 9: Complete the Title Block
Add a title block containing the property address, parcel ID, legal description, drawing scale, preparer’s name, and date. A complete title block is required by most building departments and helps prevent unnecessary revisions.
Step 10: Review Your Site Plan
Before submitting your Site Plan for Permit, compare it with your city’s permit checklist to make sure nothing has been missed. A final review can help you catch small errors and improve your chances of faster permit approval.
Common Mistakes That Cause Permit Rejection
Most permit delays happen due to common site plan errors, so double-check everything before submission. Many site plans are rejected due to avoidable errors such as:
- Incorrect or missing scale
- Missing setback measurements
- Unlabeled structures
- Missing north arrow
- Incomplete title block
- Outdated property data
- Ignoring local zoning rules
Even small mistakes can delay approval by weeks. If your application gets delayed, understanding the permit rejection reasons guide can help you fix issues quickly.
Why Most People Choose Professional Drafting
The DIY process takes 4–8 hours and carries real rejection risk. Our professional site plan service at $99 delivers a CAD-quality, permit-ready drawing in 24 hours — with jurisdiction-specific research, reviewer-requested revisions within the original agreed scope, and a the published cancellation and refund policy. We also offer floor plans, elevation plans, and full drafting services.
Get Your Site Plan Made Professionally — $99 · 12–24 hours typical for straightforward site-plan scopes
Professional, permit-ready site plans starting at $99. Standard Basic and Standard scopes typically target 24–48 hours. Nationwide online drafting support.
✅ permit-focused drafting and revision support | ✅ reviewer-requested revisions within the original agreed scope | ✅ the published cancellation and refund policy
Frequently Asked Questions
What scale should a site plan for a permit be drawn at?
Common scales for residential site plans are 1″=10′, 1″=20′, and 1″=40′. Commercial properties often use 1″=50′ or 1″=100′. Always check your specific jurisdiction’s requirements before drawing.
What software can I use to make a site plan for a permit?
Professional CAD software like AutoCAD is the industry standard. Other options include SketchUp, Adobe Illustrator, or drafting apps — but many free tools don’t produce output accepted by building departments.
What information do I need to draw a site plan?
You need your lot dimensions (from county GIS or your deed), existing structure measurements, proposed improvement details, setback requirements from your local zoning code, and your jurisdiction’s site plan format requirements.
How long does it take to draw a site plan yourself?
For a typical residential lot, expect 3–8 hours if you’re unfamiliar with the process. A professional drafting service completes the same drawing in under 24 hours.
What is a title block on a site plan?
The title block is a formatted box (usually bottom-right of the drawing) containing the property address, parcel ID, legal description, scale, north arrow, preparer name, and date. Most jurisdictions require a specific format.