
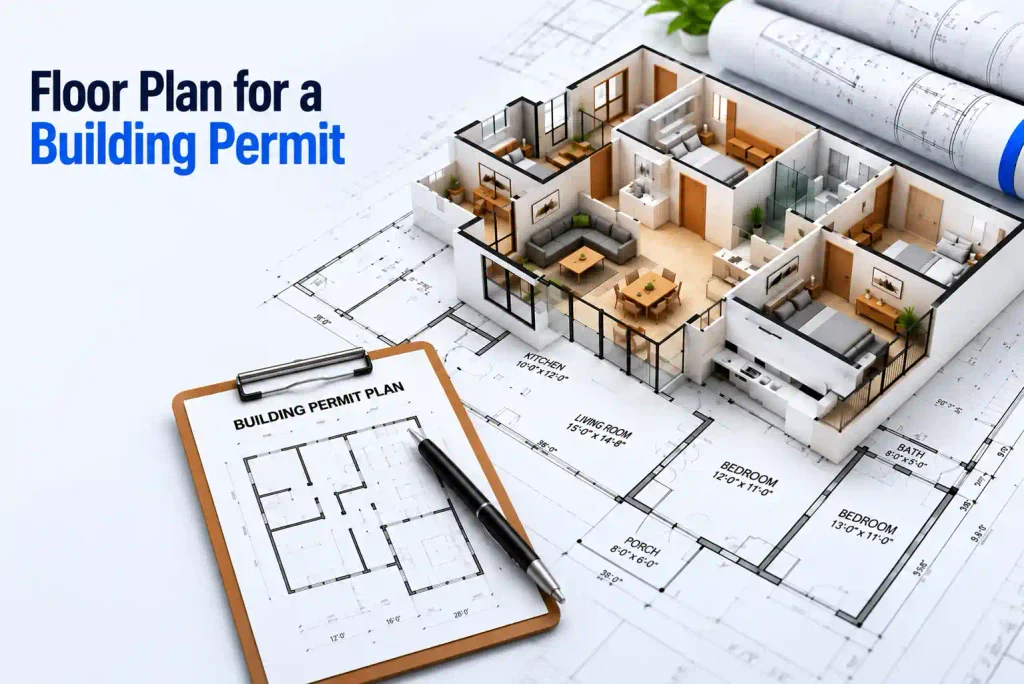
A floor plan is commonly required for building permits involving new rooms, interior reconfiguration and other work for which the reviewer must evaluate the proposed layout. Building departments use floor plans to evaluate room layouts, dimensions, safety requirements, structural changes, and code compliance before approving construction projects.
Whether you are building an addition, converting a garage, finishing a basement, or remodeling interior spaces, an accurate floor permit plan helps prevent delays and correction notices.
This guide explains when floor plans are required, what information must be included, common mistakes to avoid, and how to create permit-ready drawings that improve approval success.
If your building department requires a scaled drawing, our floor plan service for building permits covers room layouts, dimensions, openings and other project details based on scope.
Floor Plan Permit Checklist: What Should Your Drawing Show?
A reviewer evaluating a floor plan for a building permit often needs more than a room sketch. Use the project-specific permit checklist to confirm the following items:
- Existing versus proposed: clearly distinguish walls and fixtures that remain, are demolished or are newly installed.
- Rooms and dimensions: label spaces, room sizes, circulation, doors, windows, stairs and relevant ceiling or floor height details.
- Building systems: identify plumbing fixtures, electrical and mechanical scope when required; separate trade plans may also be necessary.
- Life safety: show required exits, accessibility or other safety information applicable to the use and project.
- Consistency: coordinate the floor plan with the exterior elevation drawings and site/plot plan so dimensions and opening locations match.
See our floor plan drafting service and full permit drawing set options if you need multiple sheets. The city or county determines which drawings and professional signatures it will accept.
What Is a Floor Permit Plan?
A floor permit plan shows the interior layout of a building and local building departments require it as part of a permit application. It helps plan reviewers verify that the proposed construction complies with building codes, safety standards, and local permit requirements before work begins. A typical floor plan permit includes important details such as:
- Room layouts
- Walls and partitions
- Doors and windows
- Room dimensions
- Stairways
- Fixtures and built-in features
- Labels and construction notes
An accurate floor permit plan helps reduce permit review delays, minimizes correction requests, and ensures contractors have clear construction documentation. Whether you are building a new home, planning an addition, or remodeling an existing property, a professionally prepared floor permit plan is essential for obtaining permit approval. To better understand how floor plans fit within a complete permit application, review our detailed permit drawings guide.
Why Floor Permit Plans Are Important
A floor permit plan plays a vital role in the building permit process by providing a clear representation of a project’s interior layout. Building departments use these drawings to verify that the proposed construction meets local building codes, zoning regulations, and safety requirements before issuing a permit.
A well-prepared floor plans also helps homeowners, contractors, and designers avoid costly mistakes during construction. Accurate drawings reduce the likelihood of correction notices, minimize project delays, and ensure everyone involved is working from the same set of approved plans. Some of the key benefits of a floor permit plan include:
- Faster permit reviews
- Improved code compliance
- Clear construction documentation
- Fewer drawing revisions
- Better project coordination
- Reduced construction errors
Submitting an accurate floor permit plan from the start can streamline the approval process and help your project move into construction with greater confidence.
When Is a Floor Permit Plan Required?
Building departments require floor permit plans for projects that change the interior layout or configuration of a building. Common situations where floor plans are required:
- Home additions (adding a room, expanding a room)
- Garage conversions to living space
- Basement finishing or conversion
- ADU/in-law suite construction
- Commercial tenant improvements
- Changes to load-bearing walls
- New home construction
Floor Permit Plan vs. Design Drawing
Although they may appear similar, a floor permit plan and a design drawing serve different purposes. A permit plan provides the technical details that local building departments require for building permit approval. A design drawing, on the other hand, focuses on the overall appearance, layout, and design concept of the project.
| Floor Permit Plan | Design Drawing |
|---|---|
| Prepared for permit approval | Prepared for design visualization |
| Includes dimensions and construction details | Focuses on aesthetics and layout concepts |
| Demonstrates code compliance | Highlights design ideas and finishes |
| Used by building departments | Used by homeowners and designers |
| Supports construction and inspections | Helps communicate the project’s design vision |
A professionally prepared floor permit plan provides the accurate measurements, labels, and construction information needed for permit review. While design drawings are valuable during the planning stage, most building departments require a detailed floor plan before approving construction.
What a Permit Floor Permit Plan Must Show
A permit-ready floor plan should clearly identify all building elements required for review. A complete permit drawing package often includes floor plans along with site plans, elevations, and supporting documents.
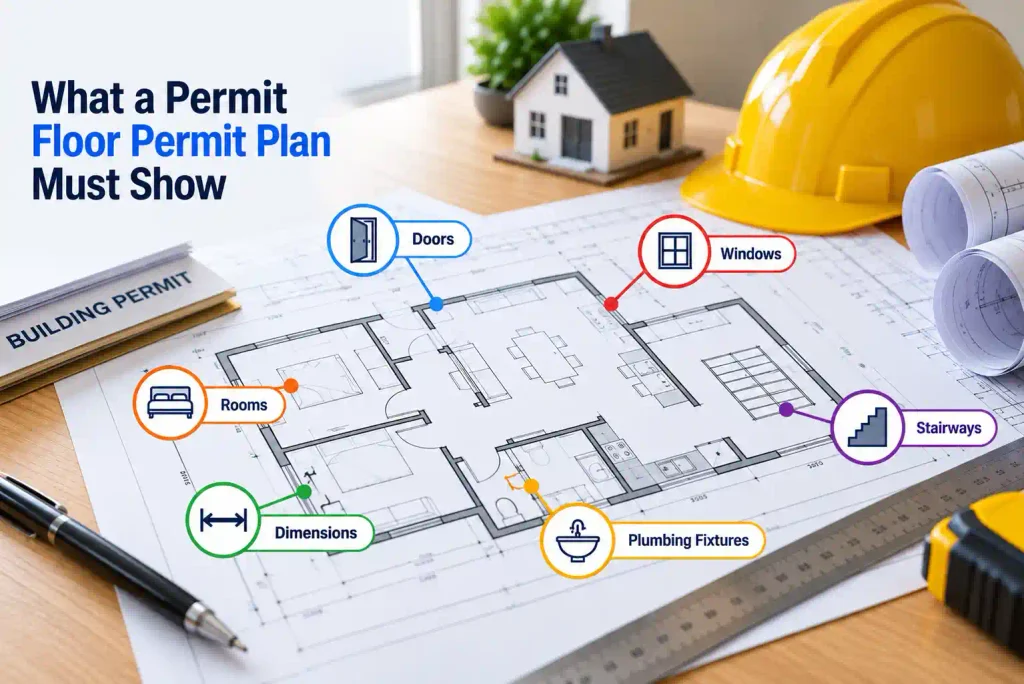
Unlike a basic room sketch, a floor permit plan must meet specific requirements:
- All rooms with accurate dimensions
- Wall thicknesses (typically 4.5″ or 6″ for exterior walls)
- Door locations with swing direction
- Window locations with rough opening sizes
- Room labels (bedroom, bathroom, kitchen, etc.)
- Square footage calculations
- Plumbing fixture locations (bathroom, kitchen)
- Electrical outlet locations (in some jurisdictions)
- Load-bearing wall identification
- Smoke detector and CO detector locations
How Floor Permit Plans Help Speed Up Permit Approval
Well-prepared floor plans reduce reviewer questions and correction requests. Following a structured permit submission process improves the effectiveness of professionally prepared floor plans. They help by:
- Improving drawing clarity
- Showing complete project scope
- Verifying room dimensions
- Supporting code compliance checks
- Reducing review cycles
Accurate floor plans often move through permit review more efficiently than incomplete submissions.
What Scale Should a Floor Plan Use?
Most residential permit floor plans use:
- 1/4″ = 1′ scale
- 1/8″ = 1′ scale for larger projects
Commercial projects may require additional scales depending on project complexity.
Always verify local requirements before submission because incorrect scales frequently trigger revision requests.
Most residential floor plans are drawn at 1/4″ = 1′ scale. Some cities accept 1/8″ = 1′ for larger homes. Commercial projects often use 1/8″ = 1′ or smaller. Always check your city’s requirements — submitting at the wrong scale is an automatic revision request.
Step-by-Step Floor Permit Plan Preparation Process
Creating a floor permit plan involves several steps to ensure the drawings are accurate, complete, and ready for permit review. Providing detailed project information from the beginning helps reduce revisions and speeds up the approval process.
Step 1: Gather Project Information
Start by collecting the details needed to prepare the permit plan, including property measurements, room layouts, existing plans, and project specifications. Accurate information forms the foundation of a reliable permit drawing.
Step 2: Create the Floor Layout
The interior layout is drafted to show the location of rooms, walls, doors, windows, stairways, and other key building features. The layout is prepared to scale and reflects the proposed construction.
Step 3: Add Dimensions and Labels
Detailed dimensions, room names, door and window sizes, and construction notes are added to the floor plan permit. These details help building officials understand the project and verify code compliance.
Step 4: Review for Code Compliance
The completed drawings are reviewed to ensure they meet local building codes, zoning regulations, and permit requirements. Any missing information is corrected before submission.
Step 5: Submit for Permit Approval
Once finalized, the floor permit plan is included with the permit application and submitted to the local building department for review. A complete and accurate drawing package helps reduce delays and improves the chances of faster permit approval.
Common Mistakes That Cause Floor Permit Plan Rejections
Avoid these common errors that result in correction notices:
- Dimensions that don’t add up (math errors)
- Room labels missing or unclear
- Doors swinging into each other or into corridors
- Minimum room size violations (bedrooms typically need 70+ sq ft)
- Ceiling heights not noted
- Plumbing walls not properly sized for drain stack
If reviewers issue correction comments, understanding the permit correction plan revision process can help resolve them faster.
Practical Floor Permit Review Checklist
Before you submit your application, review the drawing as if you were the city plan reviewer. The plan should clearly show what already exists, what is being added, where the work will happen, and how the project fits within the property limits. For permit floor plan for building, the most important details are usually the property boundaries, accurate dimensions, setbacks, north arrow, project address, parcel information, and clear labels for existing and proposed work. These details help the reviewer understand the scope quickly and reduce avoidable correction comments.
- Confirm that the project address and owner information are correct.
- Check that proposed work is labeled separately from existing structures.
- Make sure setback distances are easy to read.
- Use consistent measurements across the site plan, floor plan, and any supporting drawings.
- Attach the plan in the format requested by your local building department.
How to Prepare Your Project Details
A better starting package usually creates a better final drawing. Gather your property address, a short description of the work, photos of the project area, rough measurements, and any instructions from the permit office. If you already have an old survey, plot plan, contractor sketch, or HOA document, include it during the order process. Even when those files are not perfect, they give the drafting team useful context and help prevent missing information.
For homeowners, the goal is not to create a complicated architectural package. The goal is to give the building department a clear, scaled, and easy-to-review drawing. That is why Floor Plan for a Building Permit: What You Need to Know should focus on accuracy, simple labels, and the specific details your jurisdiction asks for. A clean plan is often easier for the reviewer to approve than a crowded drawing with unnecessary notes.
Benefits of Professional Floor Permit Plans
Choosing a professionally prepared floor plan helps ensure your project meets local building department requirements while reducing delays during the permit review process. Accurate and well-organized drawings make it easier for reviewers, contractors, and homeowners to understand the proposed construction. Professional CAD drafting services help ensure floor plans meet permit requirements and review standards. Some of the key benefits include:
- Accurate and scaled floor layouts
- Faster permit review and approval
- Improved code compliance
- Fewer correction notices and revisions
- Clear construction documentation
- Better coordination with contractors
- Reduced construction errors
A professional floor permit plan provides the detailed information needed for a successful permit application. By submitting complete and accurate drawings, homeowners can streamline the approval process, avoid unnecessary setbacks, and move their projects forward with confidence.
Ready to Get Your Permit-Ready Plans?
24-hour turnaround · Starting at $99 · reviewer-requested revisions within the original agreed scope · the published cancellation and refund policy
Frequently Asked Questions
How long does it take to get a permit floor plan?
Preparation time depends on the required drawing sheets, available measurements, project complexity and any licensed review. We confirm the delivery schedule after reviewing the documents and scope.
Do I need a floor plan for a bathroom remodel?
If you’re moving plumbing (relocating fixtures to different positions), yes. If you’re replacing fixtures in place (toilet, tub, vanity in same location), many cities don’t require a floor plan — just a plumbing permit.
Can I draw my own floor plan for a permit?
Some jurisdictions accept owner-prepared floor plans when they meet the submission requirements. Drawings should be legible, dimensioned and complete; professional drafting may reduce avoidable omissions but cannot guarantee approval.
What is the minimum room size for a bedroom?
Habitable-room minimum sizes and dimensions depend on the adopted code, occupancy and local amendments. Do not use a general bedroom rule without checking the current locally adopted provisions and any applicable exemptions.
Related Permit Resources
Related Blog Guides